As someone with extensive experience using mechanical keyboards, I understand how frustrating it can be when a key suddenly stops working. A smooth typing experience is crucial, whether you’re a programmer, writer, or gamer. In this article, we will explore various factors that can cause a mechanical keyboard key not working and provide solutions to help you resolve these issues and maintain your keyboard’s performance.
So, what could be causing your mechanical keyboard key to stop functioning? The issue could stem from dirt, dust, or debris accumulating beneath the keycap, causing the switch to malfunction, or even software-related problems. By following the guidance provided in this article, you will learn how to diagnose and resolve these issues, ensuring a seamless typing experience. So, without further ado, let’s dive into the world of mechanical keyboards and get your keys back in action.
What is a Mechanical Keyboard?
A mechanical keyboard is a type of computer keyboard that uses individual mechanical switches for each key, providing a tactile and audible feedback when pressed. This is in contrast to membrane keyboards, which use rubber domes under the keys to register keystrokes. Mechanical keyboards are known for their durability, responsiveness, and customizable features, making them popular among gamers, programmers, and typists who value a satisfying typing experience.
Mechanical keyboards come in various sizes, layouts, and switch types, allowing users to select the perfect fit for their needs. The switches in a mechanical keyboard are designed to provide different levels of actuation force, travel distance, and sound, catering to personal preferences. Some popular switch types include Cherry MX, Topre, and Romer-G, each offering a unique feel and performance.
According to a recent study by Grand View Research, the global mechanical keyboard market is expected to grow at a CAGR of 17.3% from 2020 to 2027, reaching USD 1.5 billion by 2027. This growth can be attributed to the increasing demand for high-performance keyboards in gaming and professional applications, as well as the rising popularity of mechanical keyboards among general consumers seeking a more enjoyable typing experience.
5 Common Reasons for Mechanical Keyboard Key Malfunction
Mechanical keyboard keys may malfunction due to a variety of factors. Understanding these reasons can help users diagnose the problem and apply appropriate solutions to restore their keyboard’s functionality. In this section, we will discuss the five most common causes of mechanical keyboard key malfunctions.
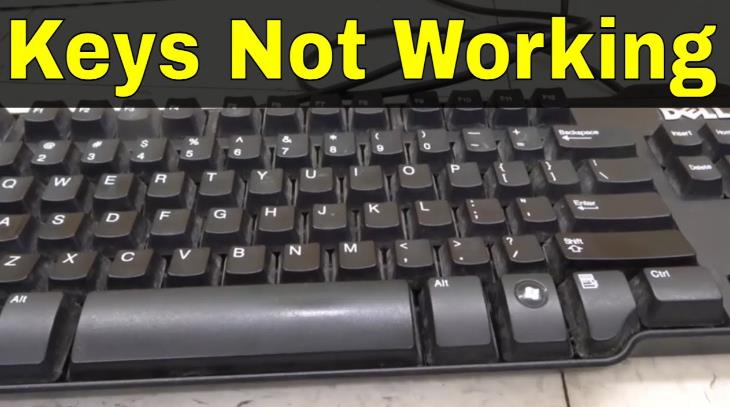
Mechanical Keyboard Key Not Working: Solutions and Tips
- Dirt and debris: Accumulation of dust, dirt, and debris under the keycaps can hinder the proper functioning of the switches, leading to unresponsive or stuck keys.
- Liquid spills: Spilling liquids onto the keyboard can cause short circuits, corrosion, or damage to the switches, resulting in key malfunction.
- Worn-out switches: Over time, mechanical switches can wear out or become damaged due to constant use, causing keys to stop working or become less responsive.
- Faulty keycaps: Cracked or broken keycaps can affect the key’s ability to actuate the switch, leading to unresponsive keys.
- Software issues: Sometimes, the problem might not be with the hardware but with the software, such as outdated drivers or incorrect keyboard settings.
By identifying the root cause of the key malfunction, users can take appropriate actions to resolve the issue and maintain their mechanical keyboard’s optimal performance.
How to Clean Your Mechanical Keyboard Properly
Cleaning your mechanical keyboard regularly can prevent key malfunctions and prolong the life of your keyboard. In this section, we will provide a step-by-step guide on how to clean your mechanical keyboard effectively and safely.
- Power off and unplug the keyboard: Before starting the cleaning process, ensure that your keyboard is disconnected from your computer to avoid any electrical hazards or accidental key presses.
- Remove the keycaps: Gently pry off the keycaps using a keycap puller or a flathead screwdriver. Be cautious not to damage the keycaps or switches in the process.
- Clean the keycaps: Soak the keycaps in a solution of warm water and mild soap for about 30 minutes. Afterward, gently scrub each keycap with a soft brush to remove any dirt or grime, then rinse and let them dry completely.
- Clean the keyboard: Use a soft brush, compressed air, or a handheld vacuum cleaner to remove dust and debris from the surface of the keyboard and around the switches. For stubborn dirt, use a cotton swab dipped in isopropyl alcohol to clean the area.
- Inspect and clean the switches: If you notice any malfunctioning switches, clean them with a cotton swab dipped in isopropyl alcohol or replace them if necessary.
- Reassemble the keyboard: Once the keycaps are completely dry, carefully place them back onto their respective switches, ensuring they are properly seated and secure.
By following these steps, you can maintain the optimal performance of your mechanical keyboard and prevent potential malfunctions caused by dirt and debris buildup.
Fixing Software Issues Related to Mechanical Keyboards
While hardware issues such as dirt, debris, or worn-out switches can cause key malfunctions on mechanical keyboards, software issues can also play a significant role in affecting the keyboard’s performance. These issues can range from outdated drivers to incorrect keyboard settings or even conflicts with other peripherals.
To address software-related issues, it is essential to keep your keyboard drivers up-to-date. Updating the drivers can improve compatibility, fix bugs, and enhance the overall functionality of your mechanical keyboard. To update your keyboard drivers, visit the manufacturer’s website, download the latest driver package, and follow the installation instructions provided.
In addition to updating drivers, it is crucial to ensure that your keyboard settings are configured correctly. This includes checking the input language, keyboard layout, and key assignment settings in your operating system. Incorrect settings can lead to unresponsive keys or improper key functions. To access and modify these settings, navigate to the control panel or system preferences, depending on whether you are using Windows or macOS.
Lastly, conflicts with other devices or software could also cause issues with your mechanical keyboard. If you are experiencing problems after connecting a new peripheral or installing new software, try disconnecting the device or uninstalling the software to see if the issue is resolved. If the problem persists, consult the manufacturer’s support resources for further assistance.
Replacing Faulty Switches on Your Mechanical Keyboard
Over time, mechanical switches can wear out or become damaged, leading to unresponsive or malfunctioning keys. Replacing faulty switches on your mechanical keyboard is an effective way to restore its functionality and extend its lifespan. In this section, we will guide you through the process of replacing switches on your mechanical keyboard.
- Power off and unplug the keyboard: Before starting the replacement process, ensure that your keyboard is disconnected from your computer to avoid any electrical hazards or accidental key presses.
- Remove the keycaps: Gently pry off the keycaps using a keycap puller or a flathead screwdriver. Be cautious not to damage the keycaps or switches in the process.
- Open the keyboard: Depending on your keyboard’s design, you may need to remove screws or snap-fit connections to access the internal components and switches.
- Desolder the faulty switch: Using a soldering iron and a solder sucker, carefully desolder the faulty switch from the keyboard’s PCB (printed circuit board).
- Install the new switch: Align the new switch with the corresponding holes on the PCB and solder it into place, ensuring a secure connection.
- Reassemble the keyboard: Once the new switch is installed, reassemble the keyboard by reversing the disassembly steps. Replace the keycaps, making sure they are properly seated and secure.
By following these steps, you can effectively replace faulty switches on your mechanical keyboard and maintain optimal performance.
The Importance of Regular Maintenance for Mechanical Keyboards
Regular maintenance is crucial for ensuring the longevity and optimal performance of your mechanical keyboard. Proper care and upkeep can prevent common issues such as key malfunctions, debris buildup, and switch wear, ultimately providing a smoother typing experience and prolonging your keyboard’s lifespan.
One essential aspect of regular maintenance is cleaning the keyboard to remove dust, dirt, and debris that may accumulate over time. This can be done using compressed air, a soft brush, or a handheld vacuum cleaner. Additionally, it is important to inspect the switches and keycaps for any signs of wear or damage and replace them as needed.
Moreover, maintaining updated drivers and software for your mechanical keyboard can help prevent potential compatibility issues or conflicts with other devices. By regularly checking for updates and ensuring proper configuration, you can optimize your keyboard’s performance and avoid software-related problems.
Regular maintenance plays a significant role in preserving the quality and functionality of your mechanical keyboard. By following a consistent upkeep routine, you can enjoy a seamless typing experience and extend the life of your keyboard.
Conclusion
In summary, mechanical keyboards provide users with a satisfying and responsive typing experience, making them a popular choice among gamers, programmers, and typists alike. To ensure the longevity and optimal performance of your mechanical keyboard, it is essential to be proactive in addressing both hardware and software issues and maintaining a regular upkeep routine.
By taking care of your mechanical keyboard through proper cleaning, switch replacement, and software updates, you can enjoy a seamless typing experience and extend the life of your keyboard. With these maintenance tips in mind, you can confidently keep your mechanical keyboard in top-notch condition and continue to enjoy its benefits for years to come.
FAQ
[faq-schema id=”1014″]