Wiring a car stereo to a 12V battery can be an intimidating task for many individuals, especially if you’re new to the world of car audio. But don’t worry, with some guidance and a little bit of patience, you’ll be able to successfully connect your car stereo to a 12V battery and enjoy your favorite tunes on the go. As an experienced car audio enthusiast, I’m here to provide you with the essential steps and tips to make this process as smooth as possible.
So, how can you wire a car stereo to a 12V battery? To wire a car stereo to a 12V battery, you’ll need to identify the correct wires, connect them using appropriate connectors, and mount the stereo securely in your vehicle. By following the instructions and advice provided in this article, you’ll be able to complete this task confidently and safely, enhancing your driving experience with high-quality sound. Now, let’s dive into the process and get your car stereo up and running!
What You Need to Know About Car Stereos and 12V Batteries
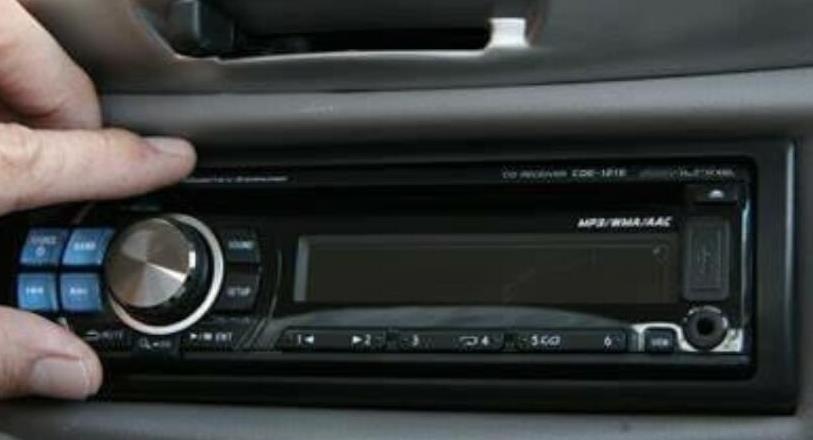
A car stereo is an essential component of your vehicle’s entertainment system, providing you with the ability to listen to music, podcasts, or even take hands-free phone calls while driving. It consists of a head unit, speakers, and other components that work together to produce high-quality sound. The 12V battery in your car powers the stereo system, ensuring a consistent and reliable source of energy for your audio needs.
Car stereos come in various sizes, designs, and functionalities, catering to different preferences and requirements. Some advanced models offer features such as Bluetooth connectivity, touchscreen displays, and GPS navigation. Understanding your car stereo’s specifications and compatibility with your vehicle is crucial for a successful installation and seamless performance.
Recent statistics show that 74% of drivers listen to music while driving, highlighting the importance of a well-functioning car stereo. A properly wired and connected car stereo to a 12V battery ensures optimal audio quality and prevents potential issues such as power fluctuations or interference. Taking the time to learn about car stereos and 12V batteries will help you make informed decisions when installing or upgrading your car’s audio system.
Gathering the Necessary Tools and Materials
Before you begin wiring your car stereo to a 12V battery, it’s essential to gather all the required tools and materials. This will not only ensure a smoother process but also help you avoid any unexpected delays or complications. In this section, we’ll outline the necessary items and their purpose in the wiring process.

How to Wire a Car Stereo to a 12V Battery: A Step-by-Step Guide
Here are the essential tools and materials you’ll need for this task:
- Wire strippers: To strip the insulation from the ends of the wires.
- Crimping tool: To secure wire connectors onto the stripped wires.
- Wire connectors: To join the stereo wires to the battery wires.
- Electrical tape: To insulate and protect the wire connections.
- Zip ties: To organize and secure the wiring.
- A multimeter (optional): To test the voltage of the wires and ensure proper connections.
Once you have gathered all the necessary tools and materials, you can proceed with disconnecting your car battery for safety and then identifying and connecting the stereo wires as outlined in the following sections.
Disconnecting Your Car Battery for Safety
Before you start working on wiring your car stereo to the 12V battery, it’s crucial to disconnect the battery for safety reasons. This will prevent any accidental short circuits or electrical shocks while handling the wires. In this section, we’ll guide you through the process of safely disconnecting your car battery.
Follow these steps to disconnect your car battery:
- Turn off the engine and remove the key from the ignition.
- Locate the car battery, which is usually found in the engine compartment or trunk of the vehicle.
- Identify the negative (-) terminal of the battery, typically marked with a black or minus sign.
- Using a wrench, loosen the nut that secures the negative battery cable to the terminal.
- Carefully remove the negative cable from the terminal, ensuring it does not come into contact with any metal parts.
Now that your car battery is disconnected, you can proceed with identifying and connecting the stereo wires without any risk of electrical hazards. Remember to reconnect the battery once you have completed the wiring process and tested your car stereo.
Identifying and Connecting the Stereo Wires
In this section, we’ll guide you through the process of identifying and connecting the stereo wires to your car’s 12V battery. Properly connecting these wires is crucial for ensuring optimal audio quality and functionality. Follow the steps below to successfully wire your car stereo to a 12V battery.
- Locate the wiring harness on the back of your car stereo. This is where all the wires for power, speakers, and additional features will be connected.
- Identify the power wires on the wiring harness. The red wire is typically the 12V positive (+) wire, and the black wire is usually the ground (-) wire.
- Strip about 1/4-inch of insulation from the ends of the red and black wires using your wire strippers.
- Locate the positive and negative wires on your car’s 12V battery. The positive wire is usually red, while the negative wire is typically black or brown.
- Strip about 1/4-inch of insulation from the ends of the positive and negative battery wires.
- Using your crimping tool and wire connectors, join the red wire from the car stereo to the positive battery wire. Repeat this process for the black ground wire and the negative battery wire.
- Insulate the wire connections with electrical tape to prevent any short circuits or accidental contact with other metal parts.
- Use zip ties to organize and secure the wiring, ensuring that it does not obstruct any moving parts or become damaged during normal vehicle operation.
By following these steps, you have successfully connected your car stereo’s power wires to the 12V battery. Now, you can proceed with mounting and securing the car stereo in your vehicle.
Mounting and Securing the Car Stereo
After successfully connecting the stereo wires to your car’s 12V battery, the next step is to mount and secure the car stereo in your vehicle. Properly mounting the stereo ensures stability and prevents it from getting damaged during normal vehicle operation. In this section, we’ll outline the process of mounting and securing your car stereo.
- If you have removed the old car stereo, clean the mounting area and make sure there are no loose wires or debris.
- Carefully slide the car stereo into the mounting bracket or dashboard opening, ensuring that it fits snugly and securely.
- If your car stereo requires screws for additional support, use a screwdriver to fasten the screws in the designated holes on the sides or front of the stereo.
- Connect any additional components such as antennas, USB cables, or auxiliary input cables to the back of the car stereo.
- Reattach the front panel or faceplate of the car stereo, if applicable.
- Secure any loose wiring with zip ties, making sure not to obstruct any moving parts or cause damage during normal vehicle operation.
By following these steps, you have successfully mounted and secured your car stereo in your vehicle. The final step is to test your stereo system and reconnect the car battery to ensure everything is functioning correctly.
Testing Your Stereo System and Reconnecting the Battery
Now that your car stereo is properly wired, connected, and mounted, it’s time to test the system and ensure everything is functioning correctly. In this section, we’ll provide a step-by-step guide on testing your car stereo system and reconnecting the battery.
- Double-check all connections and wiring to ensure they are secure and properly insulated.
- Carefully reattach the negative (-) battery cable to the negative terminal of the car battery and tighten the nut with a wrench.
- Turn on your vehicle’s ignition without starting the engine to power up the car stereo.
- Test various functions of the car stereo, such as adjusting the volume, changing radio stations, or playing music from a connected device.
- Listen for any distortion, static, or other audio issues that may indicate a problem with the wiring or connections.
- If everything is working correctly, turn off the ignition and remove the key.
By following these steps, you have successfully tested your car stereo system and reconnected the battery. If you encounter any issues during the testing process, retrace your steps and check all connections and wiring to resolve the problem. With a fully functional car stereo, you can now enjoy your favorite tunes and enhance your driving experience.
Conclusion: To Wrap up
Installing or upgrading a car stereo system involves several crucial steps, including gathering the necessary tools and materials, disconnecting the battery for safety, identifying and connecting the stereo wires, mounting and securing the car stereo, and testing the system. By following the guidelines outlined in this article, you can successfully install your car stereo and enjoy an enhanced audio experience while driving. This accomplishment will not only improve your vehicle’s entertainment system but also put a smile on your face knowing that you’ve done it yourself.
Frequently Asked Questions
[faq-schema id=”957″]


