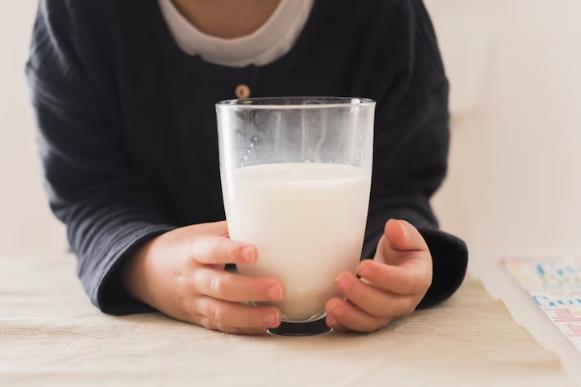
Pasteurization, a household term in the dairy industry, might seem daunting when you’re considering doing it yourself at home. However, with the right guidance and understanding, it is a process that can be mastered by anyone. Pasteurizing milk at home not only enhances its shelf life but also ensures its safety by killing harmful bacteria.
So, you may ask, how exactly can I pasteurize milk at home? The answer lies in using the right equipment and following a specific temperature and time guideline to ensure the milk is effectively pasteurized. It involves heating the milk to a certain temperature and then quickly cooling it down to kill any present bacteria. By adhering to the instructions in this article, you’ll be able to achieve successful home pasteurization. So let’s delve into the process and get you started on your journey to safe, homemade pasteurized milk.
What is Pasteurization and Why is it Important?
The process of pasteurization, named after its inventor Louis Pasteur, is a method used to kill harmful bacteria in various food products, most commonly milk. It involves heating the product to a specific temperature for a set amount of time and then rapidly cooling it down. This process doesn’t just enhance the safety of the product by eliminating bacteria but also extends its shelf life.
Moving deeper into the subject, pasteurization is a critical process in ensuring the milk we consume is safe. The main purpose is to destroy certain disease-causing germs and harmful pathogens in the milk. The process also helps in reducing the number of spoilage organisms, thereby increasing the shelf-life of the milk.
According to a study by the National Dairy Council, pasteurization does not significantly change the nutritional value of milk. It’s a common misconception that pasteurization destroys the nutritional quality of milk. In reality, the changes are so minute that they barely impact the overall nutritional profile of the milk. Thus, pasteurizing milk at home can help ensure that the milk you consume is both safe and nutritious.
Necessary Equipment for Home Milk Pasteurization
Pasteurizing milk at home may seem like a complex task but with the right tools and knowledge, it can be quite straightforward. The equipment required for home milk pasteurization largely consists of items you likely already have in your kitchen. However, making sure you have all the essentials before you start is crucial for a successful pasteurization process.

How to Pasteurize Milk at Home A Comprehensive Guide
Here are the key pieces of equipment you’ll need:
- A Large Pot: This will be used to heat the milk. A double boiler pot can be particularly useful as it prevents the milk from burning.
- A Thermometer: A dairy or candy thermometer is recommended. It’s important to have a thermometer to accurately measure the temperature of the milk during the process.
- A Stirring Utensil: A long-handled spoon or spatula will work. You’ll need this to constantly stir the milk while it’s heating to prevent a skin from forming on top.
- Ice Bath: For rapidly cooling the milk after pasteurization, an ice bath is necessary. This can simply be a larger pot or sink filled with ice water.
In summary, with a large pot, a reliable thermometer, a stirring utensil, and an ice bath, you have the essential equipment needed for home milk pasteurization. Remember that the process of pasteurization requires careful attention to temperature and time, hence the importance of having a good quality thermometer. With these tools at hand, you’re ready to start pasteurizing milk at home.
The Step-by-Step Process of Milk Pasteurization at Home
Pasteurizing milk at home is a methodical process that requires attention to detail to ensure the milk reaches the correct temperature for the right amount of time. This process not only makes the milk safe to drink by killing harmful bacteria but also extends its shelf life. Let’s dive into the step-by-step process of pasteurizing milk at home.
Here are the steps you need to follow:
- Pour the Milk: Start by pouring your fresh, unpasteurized milk into the large pot.
- Heat the Milk: Slowly heat the milk to 145 degrees Fahrenheit (62.8 degrees Celsius), stirring constantly to prevent a skin from forming on the top of the milk.
- Maintain the Temperature: Once the milk has reached the desired temperature, maintain that temperature for exactly 30 minutes. Continue to stir the milk throughout this time.
- Cool the Milk: After 30 minutes, remove the pot from the heat and place it immediately into the ice bath. Stir the milk until it cools to 40 degrees Fahrenheit (4.4 degrees Celsius).
- Store the Milk: Once cooled, the milk should be stored in a clean, airtight container in the refrigerator.
The process of pasteurizing milk at home involves careful heating, maintaining the right temperature, and then rapidly cooling the milk. Following these steps will ensure that you have safe, pasteurized milk that retains its nutritional value. Remember that careful monitoring of the temperature is crucial during this process, which is why having a reliable thermometer is so important. With this guide, you’re now equipped to pasteurize your own milk at home.
Safety Measures to Consider During Home Pasteurization
When pasteurizing milk at home, it’s crucial to keep safety as a top priority. The process involves handling hot liquids and precise temperature control, which, if not managed carefully, can lead to accidents or ineffective pasteurization. It’s important to follow certain safety measures to ensure the process is carried out smoothly and safely.
Here are some safety measures you need to consider:
-
Use Proper Equipment: Always make sure you’re using kitchen-safe equipment that can withstand high temperatures. This includes your pot, thermometer, and stirring utensil.
-
Avoid Burns: Be careful when heating the milk as it can quickly rise in temperature and cause burns. Use oven mitts or pot holders when moving the pot.
-
Monitor Temperature Closely: Don’t leave the milk unattended while it’s heating. Constant monitoring of the temperature is crucial to avoid overheating.
-
Proper Cooling: Ensure the milk is cooled rapidly after heating. Slow cooling can allow bacteria to multiply again.
-
Cleanliness: Make sure your equipment is thoroughly clean before starting. Any residues can contaminate the milk.
In summary, safety should never be compromised during the home pasteurization process. Remember to use the right equipment, monitor the process closely, and maintain cleanliness throughout. By taking these precautions, you can ensure the process is safe and effective.
The Benefits and Limitations of Home Pasteurization
Home pasteurization of milk comes with its own unique set of benefits and limitations. On one hand, it assures the safety and increases the shelf life of the milk, while on the other hand, it requires careful attention to detail and precision in temperature control.
The benefits of home pasteurization include:
- Safety Assurance: Pasteurization kills harmful bacteria in milk, making it safer for consumption.
- Extended Shelf Life: The process extends the shelf life of the milk by slowing down the growth of spoilage organisms.
- Maintains Nutritional Value: Contrary to popular belief, pasteurization does not significantly affect the nutritional value of milk.
However, home pasteurization also has its limitations:
- Requires Precision: The process requires precise control of temperature and time, which can be challenging for beginners.
- Time-Consuming: It’s a time-consuming process as compared to simply buying pasteurized milk from the store.
- Potential for Error: There’s a potential for error if the process isn’t followed correctly, which could result in unpasteurized or improperly pasteurized milk.
In essence, home pasteurization offers assurance of safety and freshness but demands attention to detail and time. It’s a worthwhile skill to acquire, especially for those who have access to fresh, raw milk. However, it’s important to understand and navigate the challenges that come with it.
Troubleshooting Common Problems in Home Milk Pasteurization
While pasteurizing milk at home, you might encounter a few common problems. These can range from not reaching the right temperature to dealing with a burnt milk taste. Understanding these issues and knowing how to troubleshoot them can help ensure a successful pasteurization process.
Here are some common problems and their solutions:
-
Not Reaching the Right Temperature: If you’re struggling to reach the right temperature, try adjusting the heat setting on your stove. Remember, it’s better to heat the milk slowly than risk overheating it.
-
Milk Burning or Sticking to the Pot: To prevent milk from sticking to the pot or getting burnt, make sure to stir it constantly during the heating process. Using a double boiler can also help prevent this issue.
-
Milk Not Cooling Fast Enough: If your milk isn’t cooling quickly enough after pasteurization, check if your ice bath is cold enough. Adding more ice or using a larger bath can help cool the milk faster.
-
Unpleasant Taste After Pasteurization: If your milk has an unpleasant taste after pasteurization, it could be due to overheating or not cooling it fast enough. Make sure to follow the correct temperature and time guidelines.
Successfully pasteurizing milk at home requires attention to detail and understanding of the process. If you encounter issues, don’t be discouraged. Use these troubleshooting tips to help guide you towards a successful home pasteurization process.
Conclusion
Pasteurizing milk at home may seem like a daunting task, but with the right information and tools, it can be a rewarding process. Not only does it provide peace of mind knowing exactly how your milk has been treated, but it also allows you to enjoy fresh, safe milk right from your own kitchen. So don’t let the process intimidate you. With careful attention to detail and a bit of practice, you’ll master home milk pasteurization in no time.
Remember, the key to successful home pasteurization lies in understanding the process, having the right equipment, and following safety measures. And if you encounter any issues along the way, refer back to this guide for troubleshooting tips. Now, get out there and start enjoying the freshness and safety of home-pasteurized milk!
Frequently Asked Questions
[faq-schema id=”1355″]


